Published
- 6 min read
Using Unofficial Cloud Storage to Sync Zotero Library

Today, I migrated my reference management software from Mendeley to Zotero. There are several main reasons:
- The old Mendeley Desktop is no longer updated, and the new Mendeley Reference Manager client is entirely cloud-based, leading to loading times and unsmooth usage;
- The browser plugin Mendeley Web Importer for importing references is not user-friendly, very slow, and often fails to import;
- Zotero is open-source software, updated frequently, with an active community.
Zotero is great, but the sync function on Zotero’s own server only offers 300MB of storage space for free users, which is quickly filled up if you have a lot of references. The reason for needing to sync the library is that if you have two computers, you need to use Zotero on both and keep them consistent. Also, if you change computers in the future, you would like to quickly sync the library to the new computer.
Download and Install Zotero
The official Zotero website is zotero.org, where you can download the Zotero installation package. No need to elaborate further here.
Migrate Mendeley Library to Zotero
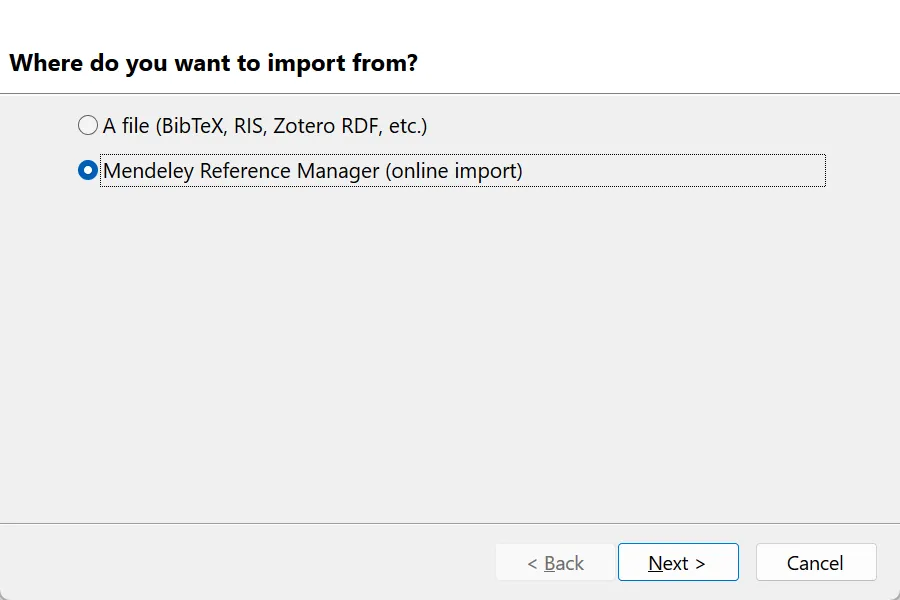
Zotero provides a one-click migration function for the Mendeley library. Just click File -> Import -> Mendeley Reference Manager in Zotero’s menu, log in to your Mendeley account, and the migration will start.
Zotero Sync Settings
First, register and log in to a Zotero account by visiting the official website. Then click Edit -> Preferences -> Sync in the toolbar and enter your account credentials.
If the Mendeley imported library exceeds 300MB, clicking the sync button in the upper right corner will show a warning that synchronization cannot be completed due to exceeding capacity. Visit the Zotero Storage page to see the storage usage.
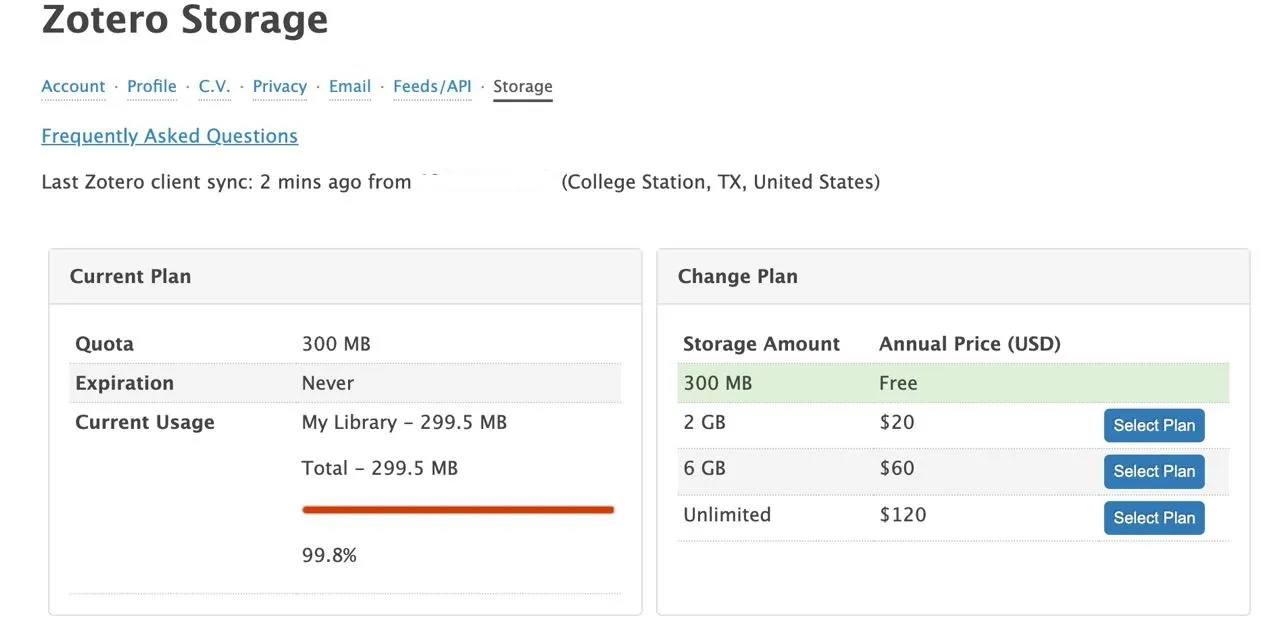
The official website offers storage upgrade plans, but they require an additional fee. At the same time, Zotero also provides other sync solutions, which is very considerate. On this page: https://www.zotero.org/support/sync#alternative_syncing_solutions, you can find other sync solutions provided by Zotero. For example, the simplest method is:
The easiest method is to use linked files, rather than stored copies of files, with only your attachment files in the externally synced folder. The ZotFile plugin can make this simple by automatically moving attachment files to a designated folder as you import them. You should also set up Zotero’s Linked Attachment Base Directory feature to point to the same folder so that Zotero can find your files on each computer, even if the path to the cloud storage folder differs.
This means using the ZotFile plugin to transfer attachment files (i.e., the PDF files of the references) to a local folder of a cloud drive, which will be automatically synced by the cloud drive. ZotFile will automatically set links to these external files, thus achieving the separation of metadata (such as the title, author, DOI of the reference) and attachments. Metadata is stored on Zotero’s server, while attachments are stored on the cloud drive. The size of metadata is much smaller than attachments, so using Zotero’s server is entirely sufficient.
I use OneDrive to sync attachments because I have co-subscribed to Office 365 Family, providing 1TB of OneDrive storage, which is sufficient. If you use other cloud storage like iCloud, Google Drive, Dropbox, etc., the method is the same.
Download and Install ZotFile
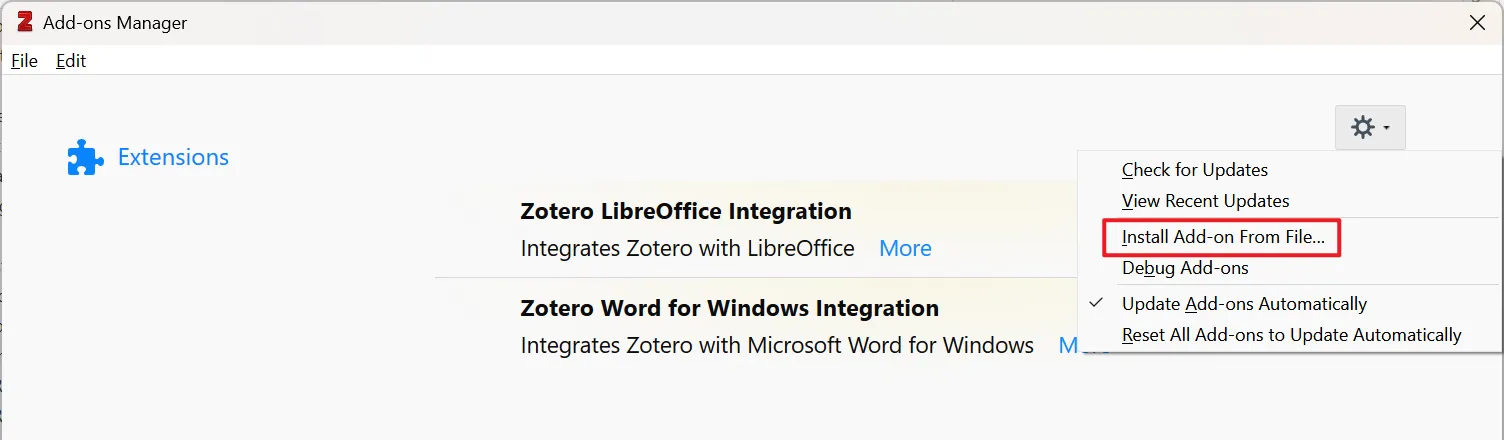
ZotFile is a plugin for Zotero. Its official website is zotfile.com, where you can download the ZotFile installation package. After downloading, click Tools -> Add-ons -> Install Add-on From File... in Zotero’s menu and select the downloaded ZotFile package. As shown below:
Set Up ZotFile
After installing ZotFile, click Tools -> ZotFile Preferences in Zotero’s menu to open the ZotFile settings interface. As shown below:
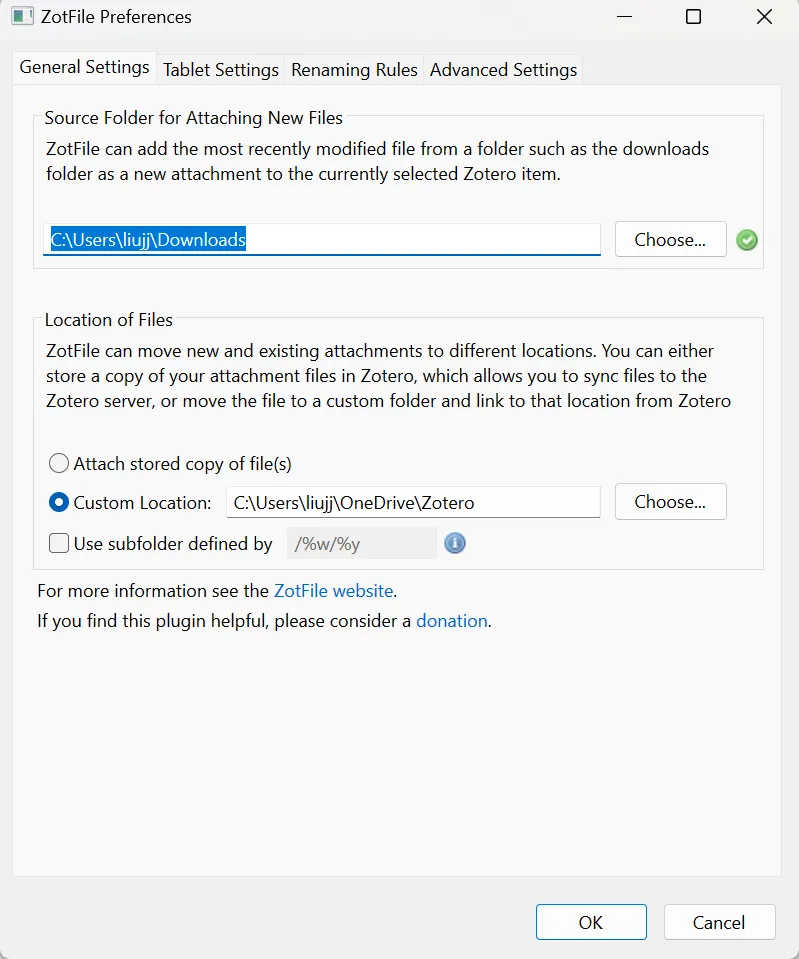
In General Settings, set Source Folder for Attaching New Files to your download folder, such as C:\Users\username\Downloads. This step makes it convenient to transfer downloaded reference PDF files to the cloud drive folder. Thus, if you select a reference, right-click, and choose attach new file, ZotFile will automatically transfer the reference’s PDF file from the download folder to the cloud drive folder and set the link to the file in the cloud drive folder.
Next, set Location of Files to your cloud drive folder. I set it to C:\Users\username\OneDrive\Zotero, where username is the Windows username. The Zotero folder is newly created in OneDrive for storing reference attachments. On Mac, the directory structure should be similar to /Users/username/OneDrive/Zotero.
Transfer Reference Attachments
At this point, the attachments of references in the library are not yet transferred to the Zotero folder in the cloud drive. The initial transfer needs to be done manually. In Zotero, click My Library on the left, press ctrl+A (or command+A on Mac) to select all references, then right-click, select Manage Attachments -> Rename and Move, and wait a few minutes. All reference attachments will be transferred to the Zotero folder in the cloud drive (here C:\Users\username\OneDrive\Zotero) and renamed according to a unified rule (the renaming rule can also be set in ZotFile settings, but I didn’t change it), making it look very tidy.
Set Zotero’s Attachment Folder
In Zotero, click Edit -> Preferences -> Advanced -> Files and Folders, and set Linked Attachment Base Directory to your cloud drive folder, here C:\Users\username\OneDrive\Zotero. As shown below:
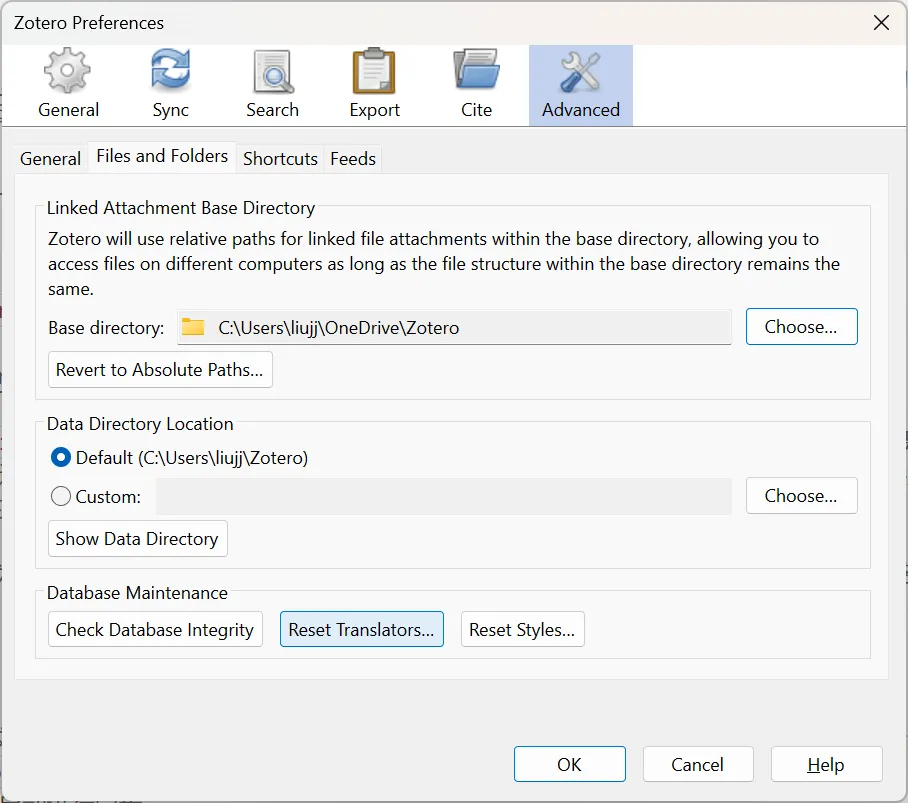
This step is essential because the cloud drive folder path may differ on different computers. For example, on Windows, it might be C:\Users\username\OneDrive\Zotero, while on Mac, it could be /Users/username/OneDrive/Zotero. With this setting, Zotero can find the cloud drive directory as the Base Directory and then locate the reference attachments within the Base Directory.
Purge Storage in My Library
After completing the above steps, theoretically, all Zotero reference attachments should have been transferred to the cloud drive. However, if you click the sync button in the upper right corner, there might still be a warning. This is because some reference attachments remain on Zotero’s server and need to be deleted manually (this might be a bug). Visit the Zotero Storage page and click Purge Storage in My Library. Then, return to the Zotero client, click Edit -> Preferences -> Sync, click Reset, and choose Replace Online Library. After that, click the sync button in the upper right corner, and there will be no warning. Note: Be careful with this step. To prevent database loss, it’s best to back up the database first. That is, copy the C:\Users\username\Zotero (Windows) or /Users/username/Zotero (Mac) folder to another location.
Sync on Other Computers
Once the above steps are completed, Zotero will have full cloud sync functionality. On other computers, simply install Zotero and ZotFile, log in to your Zotero account, set up ZotFile and Linked Attachment Base Directory similarly, then click the sync button in the upper right corner to sync the library.
Note
This post was originally written in Chinese, and the English version is translated by ChatGPT.